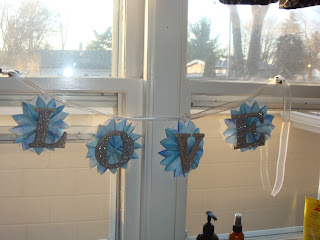
Today we are making this adorable Vintage look garland!
Supplies
chip board letters for your word
5 1/2 in square decorative paper of your choice (2 pieces needed for each letter)
3 1/2" x 5 1/2" cardstock ovals
ribbon
glitter
glue
glue stick
scissors
1. Glitter your letters.
2. Cut your ovals out of card stock. You can purchase these pre-made also. You can also add a little glitter to the edges of your ovals.
3. Measure and cut your paper to size for your flowers.
4. Now you will accordian fold your paper squares. The easiest way I think, to do this is to fold in half, fold in half again, and then once again. After you have done this, you will have to re fold to make sure both edges are folded UP.
5. Next you will want to fold your accordian together, and then fold in half and staple. Do this to the other side as well. Trim your the ends at a slant, making sure they all match and are cut in the same direction.
6. Now, glue the edges of each of the stapled, folded fans together. You can either use hot glue or regular craft glue, just make sure you hold until it is dry. Glue the final edge to make your flower.
7. Now, glue your letters to the tops of the flower. In this tutorial, I used the word LOVE, but I have done this with Peace, Joy, Merry... etc.
8. Next glue your flower to your oval. Make sure the top of the oval is between two points on the flower so you can punch a hole in the oval to hang.
9. Next punch a hole in the top of the oval, and thread and tie your ribbon to the oval.
10. Hang and enjoy!


2 comments:
I love the vintage look!! Really great tut. Thanks, Laura!!!
hugs!
Carol
What a great tut. I love the vintage look.
Linda
Post a Comment