Tuesday Tutorial
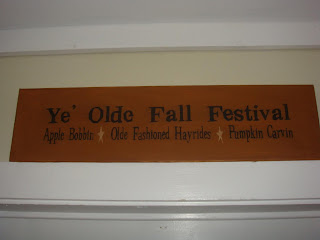
Stenciled Prim Sign
Supplies
Primitive Stencil (I buy mine from Homestead Stencil or Folk Art from the Harbor)
masking tape
Scrap Piece of 1 inch thick wood to fit stencil
Paint
Cosmetic Wedge Sponges
Minwax Stain
Sandpaper
Metal Hanger
Sealer
Paint your sign with your choice of base paint.
Center your stencil, and using the masking tape, tape down on each side.
Next, place a quarter size or so of paint on a plate. Dip your sponge lightly in the paint and immediately wipe most of the paint off on a paper towel. It takes VERY LITTLE paint to stencil. If you use too much, it will likely bleed under your stencil and give a yucky end result. You can always go back and add more paint. Using your hand without the sponge place careful pressure on the stencil. Next, carefully dab your sponge to the stencil.
Remove the stencil and wash with warm soapy water.
Allow the sign to dry well.
Now, to give it a nice, finished look, take a good liner paint brush and connect the letters where the bridges were.
If you have any "bleeding" under the stencil you can take an old toothbrush and dip lightly in the lettering paint (or different color, if you like) and hold about 4 inches above the sign. Take your finger tip and rub against the bristles of the toothbrush. This will make little speckles on the sign. Make sure you don't use too much paint... you want speckles not globs! LOL
You may now sand the sides if you would like to give it an aged look.
Next you will take your minwax stain and cover your sign with it. Then, take a rag and wipe all excess stain off.
Finally, spray with your sealer and add a metal hanger to the back.
I usually change my signs with the seasons... and I have 6 spots in my home that change regularly.


No comments:
Post a Comment