Friday, October 28, 2011

100th Post!!! Time for a Give Away!


Yay for me!  It's my 100th Post... that is a lot for me!  So, to celebrate, I am having a giveaway!!
The Giveaway will include a Colonial Tin Works Half Gallon Mason Jar Wax Melt Warmer!  The design is Mayhouse; which I LOVE!
Also included is a package of everyday potpourri and Spicy Orange Wax Melts!


And... Pumpkin Crunch Scented Putka Pods and Jack O Lantern Wax Melts!

And... Mistletoe & Ivy Scented Potpourri and Scotch Pine Wax Melts!

Your home will smell so good for many seasons to come!
Rules for this giveaway are pretty simple...
1.  Please either be a follower or become a follower of my blog.2. Please leave a comment to this post.3. If you mention my giveaway on your blog, I will enter your name twice!

I will take entries until November 5 and the winner will be drawn Sunday November 6!
Thank you so much for stopping by and I hope you decide to enter my giveaway today.
Have a wonderful Wednesday!
Laura 

Friday's Feast ~ Lobster Mac & Cheese


Okay so I know that this sounds extravagant.  But.... I am originally from Massachusetts, and growing up, my dad was a commercial fisherman.  So, I grew up with as much seafood as I wanted... only problem was I DIDN"T like seafood! LOL

When I first met my husband, he was a POOR senior in college.  I was a senior in High School.  I know, it sounds terrible, but we fell in love... and heck we are still together and in love... 24 years, not too shabby!  One day, he rode his bicycle from Bristol, RI to my home in Westport, MA.  Honestly, I can no longer remember how long it took, something like 3 hours, but what I do remember is...

When he got to my house, he was starving! I opened up the fridge and looked at him in horror and said, all we have is cooked lobster! Literally, my dad had probably 10 or more lobsters just steamed and sitting in the fridge.

Andy, my husband was like are you kidding??????  I think he decided to marry me then and there! LOL

So, 24 years later, I am always trying to come up with new lobster recipes.  I saw on the Food Network once on Diners, Drive Ins and Dives a restaurant that served Lobster Mac & Cheese.  It was a little place in Salem, Ma and actually, my family went there and ate there this summer.  I had to "try" the mac and cheese to figure out how to make it.

Here is my version.  By the way, living in Wisconsin, fresh lobster is hard to find.  My mom regularly sends us fresh, shelled lobster frozen to keep us stocked up.  We just received two pounds! 


Ingredients
10 0z. Shred Cheddar
8 oz. Gruyere
2 1/2 cups milk
1/4 onion, diced
2 cloves garlic, diced
3 T flour
1 lb pasta cooked and drained (I like the curly pasta)
lobster (cooked and chopped in large pieces)
1 T chopped tarragon
1/4 cup chopped chives
1/4 cup chopped basil
about 15 cherry tomatoes, quartered
panko bread crumbs
butter

Saute onions in about 1 T butter, cook for about 5 minutes and then add your garlic.  Add 2 more Tablespoons of butter, and then whisk in your flour.  Add the milk and continue to stir until mixture is smooth. When the mixture is almost boiling, slowly add the cheese by handfuls, making sure to stir in between each addition.  Turn the heat down heat.

Preheat oven to 400

Add the sauce to your pasta in a large bowl or pan,  add the lobster, tomatoes, herbs.  Pour into a buttered casserole dish.

Melt 2 T butter and mix with about 1 cup to 1 1/2 cups panko.  Sprinkle on top of casserole and bake for about 20 - 30 minutes until the top is golden.

Yumm!


Thursday, October 27, 2011

Thursday ~ Tip of the Day FOR me! And a Tip on Jack O Lanterns

Okay, my Thursday Tip of the Day FOR ME!!

Time for change!

I went to the doctor yesterday... boy they never have much of a sense of humor do they??  Well, they upped my Thyroid Medication... And the worst part is that even after I promised myself last year that I was going to LOSE weight, exercise daily, and finally get myself in better health... I gained 10 pounds! :-(

So, my blogging friends, this is it... I HAVE to do it this time!!  And, this time I have help!! My 22 year old son, who just graduated from college in May and got his first big boy job, and is living at home until he pays down some debt is joining me in this journey!  He and I would like to lose 100 pounds this year! 


I am making a promise to myself to start walking everyday... and gradually increase my exercise and maybe even join a gym.  And, I am going to start a serious diet... not the one I have been on.  You know the one... "I'll start tomorrow!... and then the next day, and then the next day.."

So Thursday are now going to be my Keeping Tracking Thursday.. where I will keep you up to date on my progress... and of course I will still post some Tip of the Day too! 


Tip of the Day ~ Easy Jack O Lantern Illumination

For years I disliked using candles inside our Jack o Lanterns.  They would get all black and burned inside, or only stay lit for a short time, etc.

So, a few years ago I decided to use Christmas lights.  So I just coiled up a strand of lights and placed inside the pumpkin.  The problem there is that the lights only illuminated at the bottom of the pumpkin and you couldn't really see the creation that my family worked so hard on.

So... we got smarter! 

Now, we cut the bottom off the pumpkin and carve from the bottom.  We print off or draw a design on paper, and then use an awl to poke out the design into the pumpkin; which makes it easier to cut out your design, since it is upside down.

Then I take a mason jar, and wind a set of 20-50 Christmas lights around the jar, taping here and there to hold in place.


Now when you plug into your extension cord, the cord is hidden out the bottom and looks great!


Blessings, Laura 


Wednesday, October 26, 2011

100th Post!!! Time for a Give Away!


Yay for me!  It's my 100th Post... that is a lot for me!  So, to celebrate, I am having a giveaway!!

The Giveaway will include a Colonial Tin Works Half Gallon Mason Jar Wax Melt Warmer!  The design is Mayhouse; which I LOVE!

Also included is a package of everyday potpourri and Spicy Orange Wax Melts!

And... Pumpkin Crunch Scented Putka Pods and Jack O Lantern Wax Melts!


And... Mistletoe & Ivy Scented Potpourri and Scotch Pine Wax Melts!

Your home will smell so good for many seasons to come!

Rules for this giveaway are pretty simple...

1.  Please either be a follower or become a follower of my blog.
2. Please leave a comment to this post.
3. If you mention my giveaway on your blog, I will enter your name twice! 


I will take entries until November 5 and the winner will be drawn Sunday November 6!

Thank you so much for stopping by and I hope you decide to enter my giveaway today.

Have a wonderful Wednesday!

Laura 


Tuesday, October 25, 2011

Tomorrow is my 100th Post!!!

100th Post... Wow!!

This calls for a Give Away! Something GREAT!

Stop in tomorrow to get your name entered to win!!

Tuesday Tutorial ... Faux Bowl Filler Snowballs!!


Time to start making our Faux Snowballs!

  Styrofoam balls in your choice of sizes
  Small container of white joint compound. This is found at Walmart or a home improvement store.
  Choice of Mica Glitter, German Glass Glitter or the really fine glitter you can get at craft shops.
  Fragrance oil of choice (optional)
 spices (cinnamon, nutmeg, clove ... your choice)
 Brown Craft Paint
Wax paper or Foil


Now, if you would like to make plain snowballs that aren't scented, just roll your styrofoam balls in the joint compound in a shallow dish.  Then, after your ball is covered, sprinkle with your glitter.  Gently shake off excess glitter and allow to dry on wax paper.  These can take up to 3 days to dry completely.

For Scented Snowballs:

Place your joint compound in a bowl or dish, and add your desired fragrance oil.  Start with a few drops at first, and stir to combine... take a sniff... add more if you would like.  Then, roll your styrofoam balls in the mixture, followed by your glitter.

For Grungy Snowballs:

Place your joint compound in a bowl or dish, add your desired fragrance oil and some brown craft paint.  Mix to combine and add more fragrance if you would like.  Now, roll your styrofoam balls in the mixture, and then sprinkle LIGHTLY with your spice mixture to add a little "dirt".  Then sprinkle your glitter on.


You can also make icicles too!
Just use those cheap, clear plastic icicles from the dollar store instead of the styrofoam balls. 

These are super cute sitting in an old wooden bowl.


Monday, October 24, 2011

Mason Jar Monday! Jack O Lantern Candy Holder


I wanted to make a couple of little "Thank you" Gifts for a few sweet people that do so much for me and my family! 

This is what I came up with!

I found the cute Jack O Lantern head at the Dollar Store.  He is made of a paper pulp... I thought he needed a hat! So, out of muslin, I made a pretty simple, witch's hat.  I painted the hat black with craft paint, and then added a little grunge to it, and stuck it in the oven to dry.

While the hat dried, I took off the Mason Jar lid and my Mod Podge and cinnamon.  I painted on the Mod Podge and then sprinkled the cinnamon all over.  I repeated this process another 3 times or so to get it completely covered and allowed it to dry well.

After the hat was dry, I added a little homespun band to it, for a little more of a prim look.

Next, I took my Goop glue, added a big ole' dollup on the center of the lid and attached the Jack O lantern head.  Allowed that to dry, and then filled with candy corn and gave them out to my special people.

So, so cute! And, I think I will do something similar for Christmas.


Thursday, October 20, 2011

Give Away over at KKL Primitives


Stop by http://kklprimitives.blogspot.com and sign up for this adorable pumpkin giveaway!

This Krazy Kraft Lady has wonderful items available on her selling blog too!


Thursday ~ Tip of the Day ~ Stenciling your walls


As some of you know my decorating style is PRIM!!!  However, on the other hand, my hubby likes a little bit more of a modern/contemporary style... so we have had to find lots of ways to compromise! LOL, show me a marriage of 24 years that doesn't have to find some compromise, right??

We have sort of "claimed" decorating style on certain rooms.  The laundry room, craft room, my bathroom and the kitchen are all MINE!!  The rest of the house, right now, is HIS.  I am, however, working on adding more rooms to MY list! :-)  

Our bedroom is where we have had to find ALOT of compromise!  So, here is a nifty thrifty wall stencil idea that we came up with.  We choose green for the paint on the walls, it's my favorite color, and he finds it soothing.  So, we picked two :  Kennebunkport Green is the darker shade for the bottom and Kittery Point Green is the lighter shade for the top. We carefully measured a perfect line of definition for the paint.  And then spent our Saturday painting.

Done, right???  NOPE!  It was so boring to me!! I thought about adding a stencil border or something, but we didn't want it to get too busy.  So, I came up with an idea of "stenciling" the bottom with clear spray gloss sealer.  Off we went to pick out a wall stencil to Hobby Lobby... hmmm yep, not going to spend $72.99 for the stencil I LOVED when my hubby is as talented as he is!

So, instead we picked up a big piece of poster board and he free handed the stencil to match the filigree pattern in our valance. I cut out the design using an exacto knife. And, voila for only $1.29 we had our stencil!


Using the clear spray gloss sealer was awesome, because it just gave a sheen to the design and didn't add color or busyness!


So, a few weeks later I was working up in my daughter's room! She decided she wanted her room painted bright green, purple and black!  And, so I mentioned adding a little zing with a stencil... and we looked up some design ideas online. 


We loved this look! 


She loved the filigree in this design.


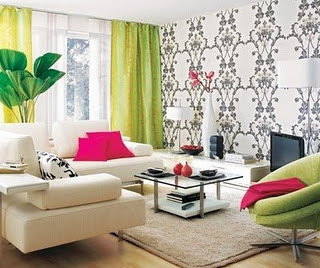
We thought this one was cute too...but, we were already sold on the filigree!
She loved the idea! 

But, her dear daddy was away on a business trip...and she and I are not the most patient people! Like mother like daughter! :-)

So, we picked out our design and I headed off to hobby lobby to see what they had in the market of plain stencil plastic to cut our stencil out of.  Well, the stencil plastic was SUPER expensive, and actually not big enough to make a large enough stencil... plus I wanted to do this as thrifty as possible, just in case we weren't happy with the end result.

So, we stopped  off at Office Max, which is right next door to HL.  I found these clear plastic folders.  I picked them up for .79 each!  Brought them home, opened them up, cut off the part that folds back to make it a folder, and taped the two long sides of the folder together with heavy duty clear packing tape.  I printed off the design we liked, and then ran down to the grocery store/photo department and had them blow up the picture. Then, when I got home I grabbed my sharpie and carefully traced the design onto the two folders taped together and then cut the design out with my exacto knife! And voila, a stencil is born for less than $2.00!

Here is what we came up with!


The green is bright! But, she loves it and it suits her outgoing personality!


We made another stencil for above and below her skylight.


Here are some stencil patterns... I hope this inspires you to get stenciling!


Monday, October 17, 2011

Mason Jar Monday! Mason Jar Sewing Kit

Just the cutest little sewing kit ever! And so easy!  Great gift idea too!!


Items you will need:

mason jar w/ lid (you don't need the seal)
cardboard
fabric
fiberfill
glue gun

Okay, first you need to trace the outside of the lid once on your cardboard and twice on your fabric.  Cut the circle out of the cardboard along the line.  Cut out one circle of the fabric along the lines and on the second circle leave about 3/4" outside the line and cut so the circle is larger than the traced one.


Now take your larger circle, and some of your fiberfill, you want it to be puffy enough to hold your pins and needles.  Place your cardboard circle over the fiberfill, and carefully with your glue gun glue longer edges tot he cardboard so that the front side is nice and puffy.


Now glue your smaller circle to the the cardboard to cover the edges and make it look a little more finished.

Lastly, fill your jar with thread, needles, thimbles, etc.


Friday, October 14, 2011

Friday's Feast ~ Cranberry Pot Roast


With Fall approaching... I thought I would share my Cranberry Pot Roast recipe.  It is so tender and good!  

I hope you enjoy!

1 Beef Roast
1 onion, sliced
1/3 cup Catalina or French Salad Dressing
1 can jellied cranberry sauce
2 cloves of garlic, crushed
2 TB butter, softened
2 TB flour

Trim the fat from the roast and put in the crock pot.  Put the onion and garlic on top of the roast.  Mix together the cranberry sauce and dressing and pour over the roast.  Cover and cook on low all day, until done.  

Remove the roast from the crock pot.

Mix together the butter and flour and whisk into the gravy left in the crock pot. Turn the crock pot on high and cover for 10 minutes or so.  Slice the roast and serve with the gravy.

** you can also omit the onion and add a packet of dried onion soup mix. **

I serve mine with mashed potatoes and a nice big salad.

Yumm!

Wednesday, October 12, 2011

Whatcha Workin on Wednesday~ Two projects going!

Well today, I have two projects going! So like me... God forbid I just tackle one at a time.  :-)

So the first, is to sort through about a dozen HUGE boxes that I bought from a store that recently closed.  Alot of it is Holiday florals... but there is so much stuff, I am not even sure what I all got!   I will post pictures of it later today.  My friend is coming to help... so this should be interesting.  Some will go out to my shop and some I will hold off and put in either my new shop or on Ebay/Etsy.  

Oh, that reminds me, I guess I have 3 projects going today after all!  I am going to open up an Etsy account/shop.  I hear so many great things about Etsy... so thought I would give it a shot! If you have any advice, please SHARE! I have sold on Ebay for YEARS, but thought I would try something new!

And my last project is making some adorable Prim Snowman Ornies! I will share my pictures and free pattern from Annie's Cupboards too, this afternoon.

Well, I will be back... wish me luck! :-)

Have a fabulous Wednesday Morning... see you soon!


Tuesday, October 11, 2011

Tuesday Tutorial ~ Grungy Hang Tags


Well with the holidays right around the corner, and all of our craft projects that we need to get done, I thought I would share my recipe for Grungy, Grubby Hang Tags.  I like to add these to everything!  Bags of potpourri, dolls, Santas, presents, etc... 

Ingredients

Instant Coffee
Vanilla 
2 cups hot water
Ground Spices ~ cinnamon, cloves, etc
Bowl
wooden spoon
Hang Tags


In Bowl, combine coffee granules and 2 cups hot water.  Mix to combine, then add vanilla and spices to your liking.

Next get your hang tags, now you can keep them flat or you can crumple them up and flatten them out again, it's up to you.  I like to make them both ways, because I use them for different things.

Dip the tags into the spice mixture and allow to sort of drip dry.  Now, place them on a cookie sheet.  Turn oven on to 200 degrees, and place cookie sheet in.  Keep an eye on them, and remove when they are dry.


New get creative! Start stamping, drawing, cut and pasting... you decide!


Monday, October 10, 2011

Monday Makeover!

So I have had this old wooden shelf for years.  It definitely needs some prim fixin' done to it! So... Makeover Monday!


So I pulled out my Country Living Texture Paints.  Painted a coat of Chocolate.


I let that dry well.
And then added a coat of pumpkin!


Now, I will let that dry well, and get my sand paper and water based stain ready.


So, I just started sanding here and there, where ever I wanted that worn look. I tried to get the black to come through, but not too much of the white underneath.


Keep sanding...


And, finally done with sanding.  I wanted the inside of the shelf to look really worn, like for years someone had slid things in and out.


Next, I took out my water based walnut stain (or toner if you are using Country Living Coloma Colors paint).  And, using my sponge brush just covered the whole thing.  Then I took my rag and rubbed off most of the stain allowing it to stay thick in some spots.


You can see how I left some of the areas darker.

Then, after I let it dry well, I sprayed it lightly with a water based matte sealer.

Done!


Just add a few finishing touches... and hang.

How easy is that??


Now you can go to your local Thrift Stores, Good Will, etc and find all of those ugly, yucky wooden shelves just begging you to take them home and get going on your own Prim Make Overs!